How to Wire Recessed Lighting
The majority of houses nowadays use recessed lighting. This type of lighting can be used for any purpose. You can use have them for task lighting, room lighting, and even accent lighting. If you want to get a little creative, you can even use these lights for serving different decorative purposes. With these lights, you can change the overall vibe of the room and match it to a specific mood.
Installing recessed lights would be a good choice. They are cost-effective as well as easy to install. Even though wiring of recessed lights is a straightforward process, you still have to be careful since you are working with electrical components. To make sure you do it right, follow this guide on how to wire recessed lighting religiously.
Safety Precaution
Before getting started, make sure that the power line is turned off. And when touching the wires, use insulated tools and assume that the wires are live when working on them. For added safety, you can test the wires using a voltage detector or a multi-meter.
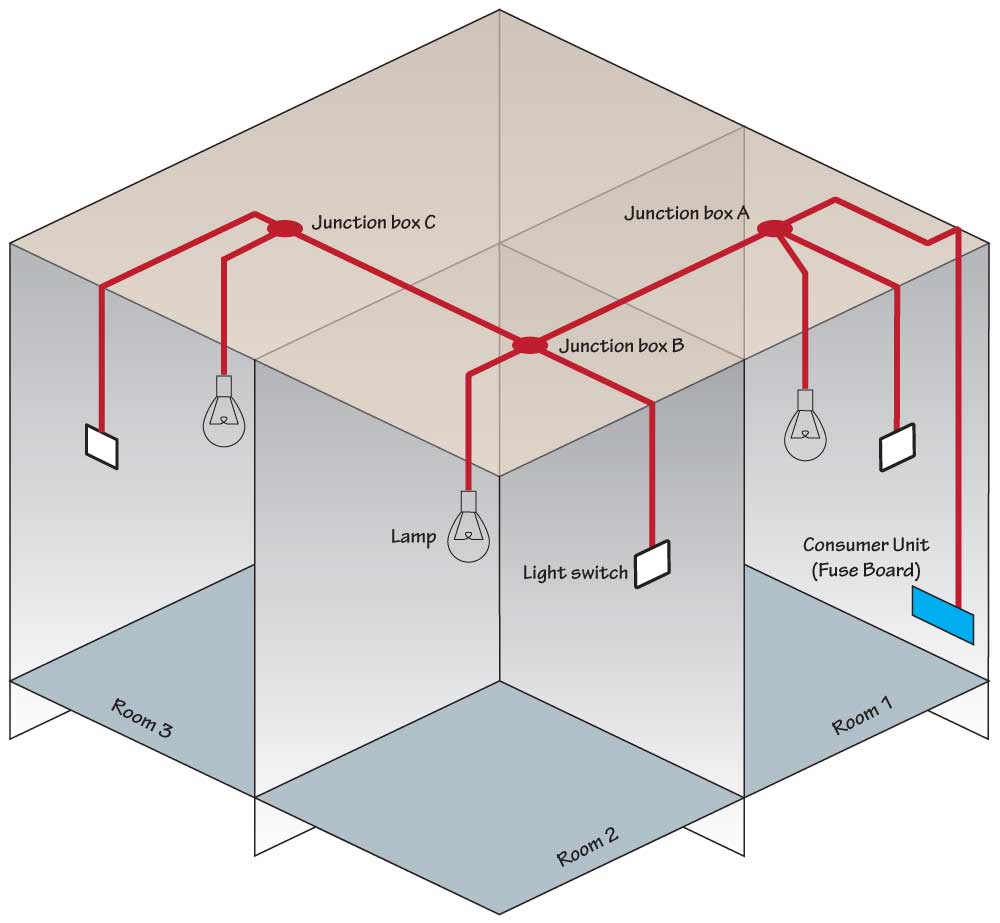
STEP – 1: Install the junction and switch boxes first
To conveniently control the recessed lights, you will need to have switches. Now, you don’t always have to worry about installing switch boxes. You can use existing switch boxes for single fixture lighting. While you can use them for multiple fixtures, you have to ensure the switch can handle the electrical load. Some recessed lighting package comes with switches, all you need to do is install them. In some cases, you may need to add junction boxes to make way for new connections.
STEP-2: Prepare the wiring
First, you have to decide on the power source. You can tap from a nearby connection or make a new circuit that runs to the main power line. For a small number of multiple fixtures, you can go with the first option. Run the wires beneath the ceiling and drill holes to where you want to put the fixtures. Make sure the wires run through those holes so they can supply power to the fixtures.
STEP-3: Run the wires to the lighting
Before getting started, you have to keep in mind that certain states may require you use specific wire gauges for your wiring. If you don’t know how to go about this, you can use 12-gauge wires. Most states require 12-gauge wires for most types of wiring.
Make sure that you only use insulated wires for your safety. Build the circuit for the fixtures by connecting the end of the wires to the power source. When tapping into an existing wire, you might want to use a junction box. If you are connecting to the main power source, you will likely need to install a new circuit breaker.
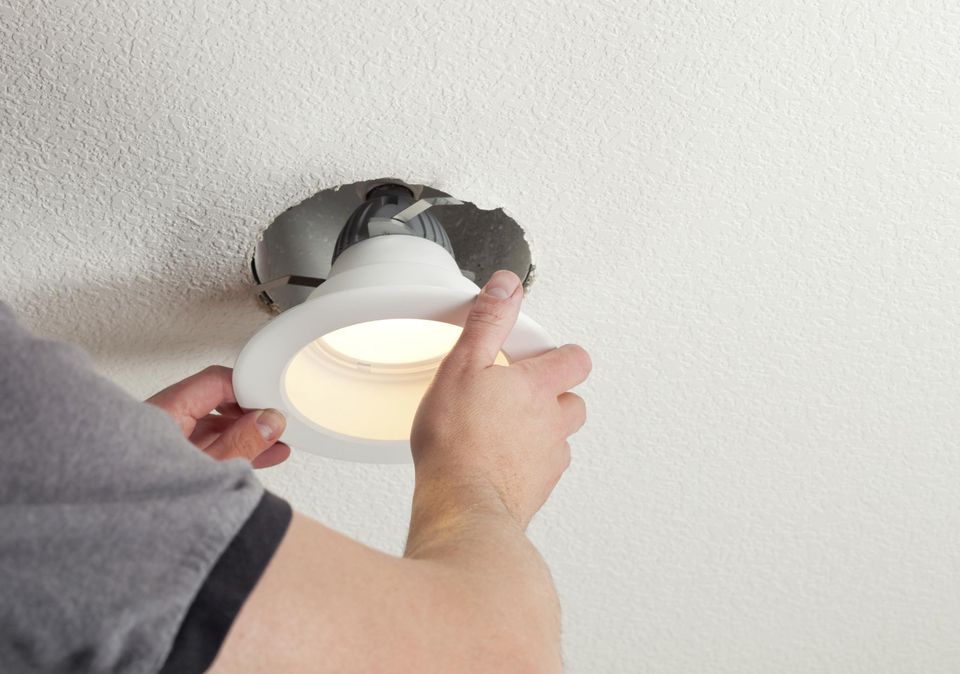
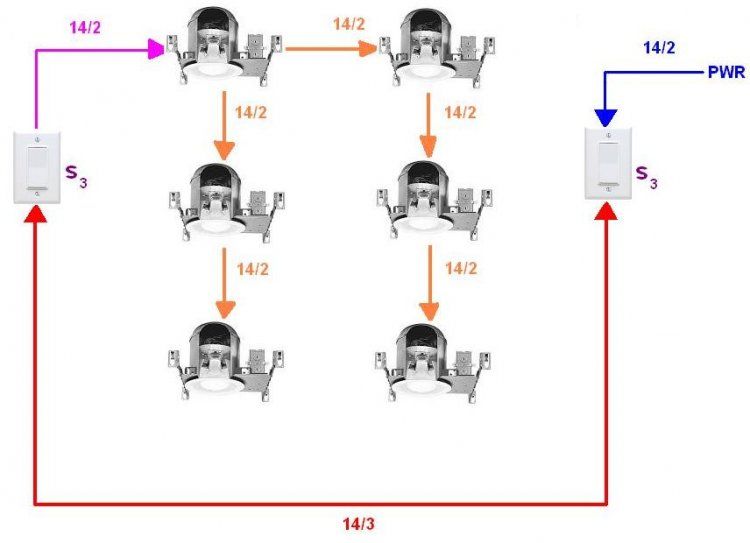
STEP-4: Connect the fixtures
Once the wires are in place, connect them to individual fixtures. For a clean installation, you can also attach junction boxes on the individual fixtures.
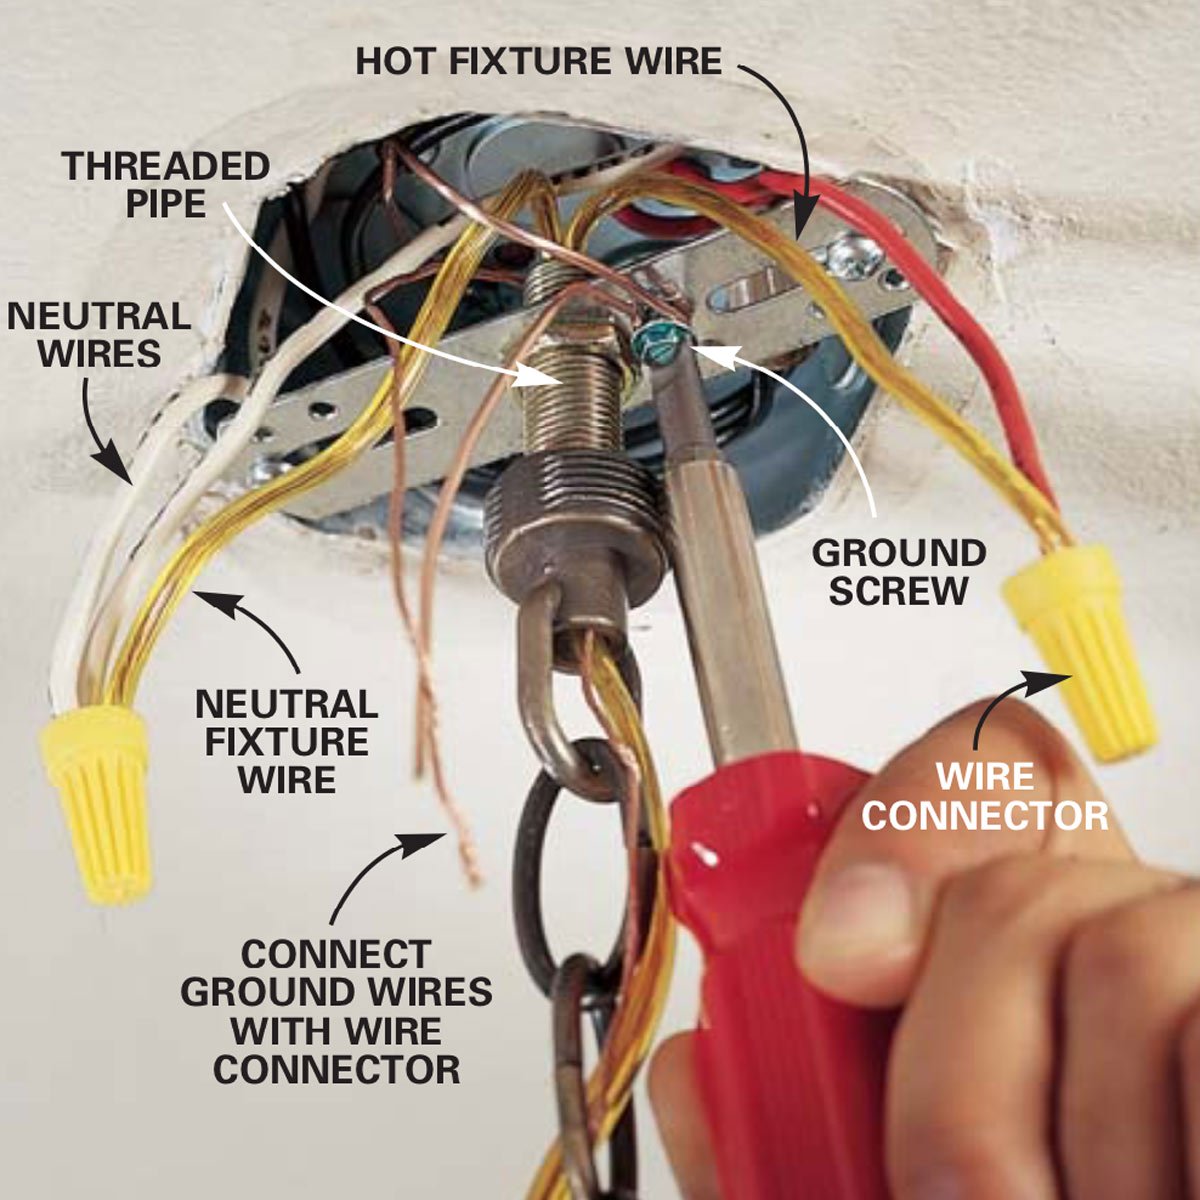
Whether you are installing the fixtures in series or parallel, wires should come in and out of the junction boxes. If you have a ground wire, connect it to the ground screw of the junction box. In case you don’t have junction boxes, you can connect the ground wire using the ground screws of the fixtures. Make sure they are connected properly.
STEP-5: Connect the switches
After connecting the wires to the fixtures, connect the wires to the switches to close the circuit. Pull the excess wire from the end of the series of fixtures so you can connect it to the switch. If you have individual switches for each fixture, connect them directly to each of their switches. Once the wires are connected to the switches, secure them with box clamps.
STEP-6: Test the lights
Once the wires, switches, and fixtures are all connected, turn on the power and switch the lights. In case of faulty lights, you can test individual fixtures using a multi-meter and have them replaced by the manufacturer. If the lights are fully working, clean the area and enjoy the new look of your house.
Recessed lighting allows you to put more illumination to your house and create a certain mood without requiring you to spend a lot of money. Homeowners prefer to use recessed lights because they are not affordable but also easy to install.
Video Review
#1
#2
#3
Related


About The Author
Jeremy
May it be a light to you in dark places, when all other lights go out. ― J.R.R. Tolkien